This post may contain affiliate links. Please read our disclosure policy.
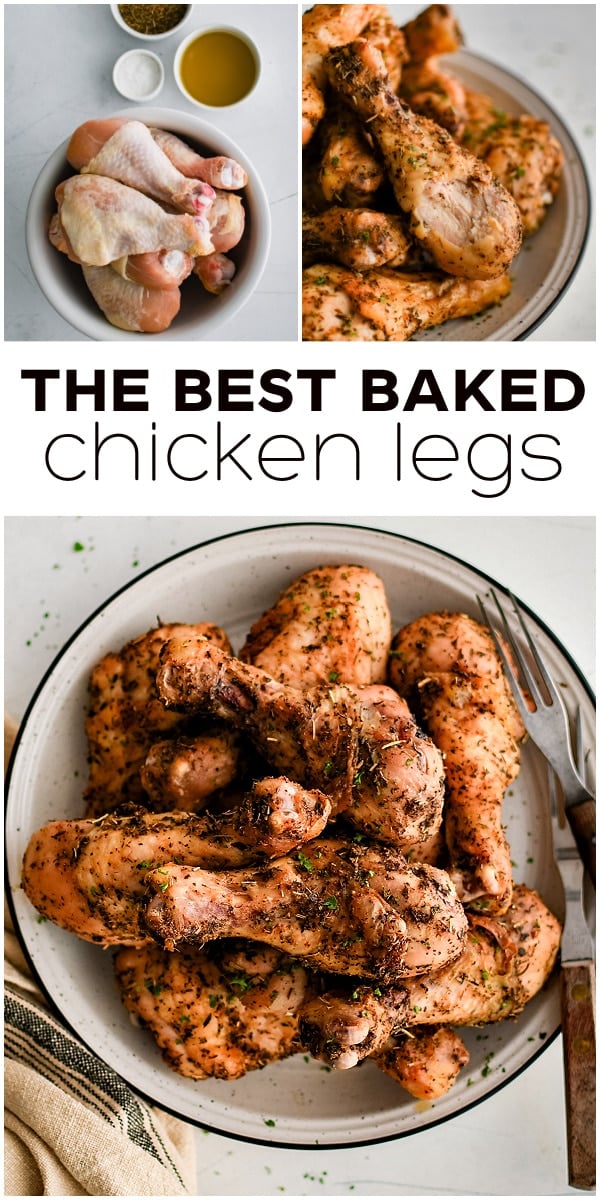
These Oven-Baked Chicken Legs (Drumsticks) are tender and juicy on the inside and perfectly crispy on the outside. Seasoned with a simple, flavorful, and delicious homemade poultry seasoning, they’re super easy to make and a guaranteed hit with both kids and adults alike!

Who’s ready to make the best damn baked chicken legs ever?
Ok, so yes, I may be a little biased since I made them, but I really do love this recipe. And so does my family, which actually says something since they’re pretty (brutally) honest about their review of my cooking. spoiled.
Anyway, chicken legs, also known as chicken drumsticks, are one of my favorite things to pop in the oven when I want something quick and easy that won’t bust the budget. While it’s true that I prefer baked chicken breasts (my family disagrees with this one), the prices these days are crazy! I’m sure most of you would agree, so drumsticks to the rescue!
For this recipe, we’re coating the chicken in my homemade poultry seasoning. I use this seasoning for both everyday chicken recipes and my Thanksgiving turkey. It’s made with simple pantry ingredients, most of which you probably already have (dried thyme, basil, oregano, marjoram, rosemary, paprika, onion powder, and garlic powder). Of course, if you have a favorite seasoning, feel free to use that. This homemade Cajun seasoning is another fantastic option and perfect if you like a little kick to your chicken.
Table of Contents
Are Chicken Legs the Same as Chicken Drumsticks?
Not exactly, but the terms are often used interchangeably (as I do in this recipe). A chicken leg refers to the entire leg section of the bird, which includes both the thigh and the drumstick. The drumstick is just the lower part of the leg, below the knee joint.

Cooking Tips
For the crispiest skin and juiciest inside, you’ll need to dry your chicken thoroughly. The easiest way to do this is by patting the chicken dry with paper towels. It is not necessary to wash chicken before cooking it. If you have a little extra time, you can also air-dry the chicken in the refrigerator overnight. Simply place the chicken uncovered on a wire rack over a baking sheet and leave it in the refrigerator for several hours to overnight. The dry environment of the fridge naturally draws moisture from the skin. Removing any excess moisture will help the skin crisp rather than steam.
It’s also helpful to bake the chicken legs on a wire rack set on a baking sheet. This allows air to circulate around the chicken, allowing the skin to crisp on all sides. Finally, for extra crispy skin, try broiling your chicken legs for the last 2 minutes of cooking. Just be sure to keep a close eye to prevent burning.
Finally, lightly dust the chicken skin with baking powder (not baking soda) before cooking. Baking powder raises the skin’s pH, which helps to break down proteins and encourages browning and crispiness.
Best Temperature to Bake Chicken Drumsticks
I’ve found that 425°F (220°C) is the ideal baking temperature for chicken legs. The temperature is high enough to allow the skin to render its fat and become crispy (without burning) while allowing the meat below to cook and stay juicy. At this temperature, the internal temperature of chicken legs should reach 165°F (75°C) in about 35-40 minutes.
Different ovens and the size of your chicken drumsticks may affect the total cooking time, so I always recommend checking the internal temperature using a digital meat thermometer around the 30-minute mark.

Key Ingredients
Find the printable recipe with measurements in the recipe card below.
- Chicken Legs (Drumsticks): Made from dark meat, chicken drumsticks are flavorful and juicy, rich in fat and collagen. They are ideal for baking and more affordable than other cuts of chicken.
- Olive Oil: Used to coat the drumsticks, helping the skin crisp. Butter may also be used. Melt the butter first and use a pastry brush to brush it over the chicken.
- Seasoning and Spices: As I discussed above, this recipe uses my homemade poultry seasoning, which is made using a combination of dried herbs (thyme, basil, oregano, marjoram, and rosemary), paprika, onion powder, and garlic powder. If you prefer not to make your own batch of poultry seasoning, you may also use a combination of Italian seasoning with paprika, onion powder, and garlic powder.
- Salt and Black Pepper: Add according to your own personal tastes and preferences. A good place to start is a half teaspoon of each.
- Baking Powder: This helps the skin become even crispier. Please do not confuse baking powder with baking soda.


How to Bake Chicken Legs (Drumsticks)
1. Prep the chicken: Place a cooling rack over a large baking sheet and layer with paper towels. Arrange the chicken on top of the wire rack and tent with more paper towels. Transfer to the refrigerator for at least two hours, ideally overnight. If you are short on time, use paper towels to pat the chicken legs as dry as possible.
2. Preheat the oven: Preheat the oven to 400 degrees Fahrenheit, discard the paper towel from the cooling rack, and spray it with non-stick cooking spray.
3. Season the chicken: In a large mixing bowl, combine the olive oil with the poultry seasoning, salt, black pepper, and baking powder. Add the chicken to the bowl and gently toss to coat (I’ve found that using my hands works best to distribute the seasoning evenly).
4. Bake: Transfer the chicken legs to the top of the wire rack, leaving space between each of them for even baking. Cook in the oven for 35-40 minutes or until a digital meat thermometer reads 165 degrees F when inserted into the thickest part of the chicken.
5. Rest and Serve: Remove the chicken from the oven and allow them to rest for 5 minutes before serving.


Frequently Asked Questions
Yes. Check out my full post and recipe for Air Fryer chicken legs.
For super crispy skin, I always bake my drumsticks uncovered. Some recipes suggest baking them covered for the first 20 minutes or so and then uncovering them for the remaining cooking time, but this seems counterintuitive (especially given the effort we went through to dry out the skin before cooking).
If you are baking your drumsticks on top of a wire rack set inside a baking sheet, then no, you do not need to flip them. If you are baking directly on top of a foil-lined baking sheet, then yes, you’ll want to flip your drumsticks halfway through cooking.

Storage and Reheating
Transfer leftovers to an airtight container and refrigerate for up to 3-4 days. For longer storage, you can freeze leftover baked chicken legs. Wrap each chicken leg in plastic wrap and place it in a freezer-safe bag or container. Freeze for up to 2-3 months.
Chicken drumsticks can be reheated in the oven, air fryer, or microwave. I always use the microwave (because I’m lazy), but for those of you dedicated to crispy skin every time, the oven or air fryer is definitely your best bet.
- Oven: Place the drumsticks on a baking sheet lined with foil or parchment paper. Lightly spray with oil and loosely cover with foil. Heat for 15-20 minutes in an oven preheated to 350°F (175°C).
- Air Fryer: Place the drumsticks in a single layer in the air fryer basket. Make sure they are not overcrowded. Lightly spray with a little oil to help them crisp up. Cook the drumsticks in the air fryer at 350°F (175°C) for 5-7 minutes, flipping them halfway through. If reheating from frozen, you may need to extend the time to 10-12 minutes or more.
More Amazing Chicken Recipes
- Cornflake Chicken
- Crack Chicken Casserole
- Chicken and Wild Rice Casserole
- Easy Greek Lemon Chicken Thighs
- Crispy Oven Roasted Chicken Legs with Potatoes
- Baked BBQ Chicken
Browse all of my Chicken Recipes.


Crispy Baked Chicken Legs Recipe
Ingredients
- 2 pounds chicken drumsticks, cleaned, with the excess fat removed
- 2 tablespoon olive oil
- 2 tablespoon poultry seasoning, or seasoning of choice
- ½ teaspoon salt, plus more if desired
- ½ teaspoon black pepper, plus more if desired
- 2 teaspoon baking powder
Instructions
- Place a cooling rack over a large baking sheet and layer with paper towels. Arrange the chicken on top of the wire rack and tent with more paper towels. Transfer to the refrigerator for at least two hours, ideally overnight. If you are short on time, use paper towels to pat the chicken legs as dry as possible.
- Preheat the oven to 400 ℉, discard the paper towel from the cooling rack, and spray it with non-stick cooking spray.
- In a large mixing bowl, combine the olive oil with the poultry seasoning, salt, black pepper, and baking powder. Add the chicken to the bowl and gently mix to coat (I’ve found that using my hands works best to distribute the seasoning evenly).
- Transfer the chicken legs to the top of the wire rack, leaving space between each of them for even baking. Cook in the oven for 35-40 minutes or until a digital meat thermometer reads 165 degrees F when inserted into the thickest part of the chicken.
- Remove the chicken from the oven and allow them to rest for 5 minutes before serving.
Notes
- Place leftovers in an airtight container and store in the refrigerator for up to 3-4 days.
Nutrition
Nutrition information is automatically calculated, so should only be used as an approximation.